 My students loved the idea of ThingLink. I showed my first ThingLink presentation about pit bull terriers. The students enjoyed the pictures, videos and simplicity of visiting various sites. We didn't watch all of the videos, but we did read some of the information pertaining to responsible ownership of pets. We talked about prejudices and misconceptions derived from media, gossip, and irresponsible individuals. The presentation was a great springboard for class discussion. As a class, we also decided that ThingLink could be utilized as a digital concept map. Often times, students will use the classic paper and coloring utensils to create concepts maps. This enables them to digitally demonstrate their understanding of subject matter. Sadly, they cannot use ThingLink due to restrictions by the school district. Since they can operate a search engine within the site, they have the ability to access inappropriate material. I explained that they could access this site at home, but we would not, as class, use the ThingLink at school. I mentioned that future book reports could be created and the URL emailed to my district email. Though ThingLink is a great way of combining material into a user-friendly environment, it doesn't truly display what a student knows, or what they learned. It allows them to display the knowledge of others, but it isn't a demonstration of what they actually know.
Below is my ThinkLink presentation on pit bull terrier
 Kids love games. Mix it with a bit of learning, and you will have their attention. I created a game that merges surfing with subjects and predicates. Reading Street is such a drab approach to various subjects, that the game brings a fresh mix to the day. Along with tantalizing pictures of massive waves and surfers (either riding a wave or crashing pending studnets' responses), I incorporated the students' names in each sentence. This captivated their attention and peaked their interest in each slide. I shared this with the other teachers in my grade and their classes loved it!
I am in the process of changing a few things. I need to distinguish between complete subjects/predicates and simple subjects and predicates. I am also looking into changing the font and style of the text linked with a hypertext. Each hypertext became underlined, blue, and would change to a fuchsia if selected. I also had to finagle how each word was selected so the underline would not break and hint to the answer. The last item i am currently revising are the pictures for each slide. I need more of a variety on the correct answer slides. PowerPoint does not make this easy. Each time I set a picture for the background, I have to go through the labyrinth of files to find the location. For some reason, it doesn't remember the previous pathway. This makes setting the pictures tedious. Regardless, the students really enjoyed it, and they finished the lesson with a better understanding of subjects and predicates.
 The students loved Edmodo. I created a 13 question quiz to determine the students familiarity and prior knowledge of their upcoming spelling words. The spelling words came from Unit 1 Week 2 in the 5th grade Reading Street program. After completing the quiz, I created 2 polls for the students to complete. The first poll pertained to the quiz, the latter asked about their favorite color. This was fun practice for them, and valuable experience for me. They enjoyed taking the polls and many students liked the ability to comment/post on the news feed.
I planned ahead for their excitement over posting and responding to posts. With the help of Quail Hollow's Ed Tech, Danae Reff, we tackled the tough topic of Cyber-Bullying. We laid ground rules and procedures for operating online. We talked about consequences and possible issues that could arise if students were irresponsible with online forums. The discussion was incredibly insightful, and relayed information that is critical in this modern day of technology. Even if I never use Edmodo again, the insight and conversation spawned from this exercise was invaluable to their development in the digital world.
Data Dashboard can be an incredible tool for analyzing and viewing students assessments, benchmarks, and progress monitoring. By accessing your class, you have all the district collected data for each student in your class. There are various display options that allow you to focus and view specific forms of data. Luckily, at Quail Hollow Elementary, we have the privilege of working cross grade level with the educators from the previous year. We get their collected data and have the opportunity to vertically team. Vertically teaming provides several forms of insight that correspond with the scores accessed through Data Dashboard. This tool can be invaluable when starting out a year and attempting to group students for instruction.
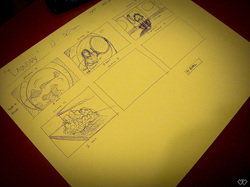
 The digital storytelling was a great opportunity to create a video for my future class(s). Sadly, due to footage showing activities in my class with students, I cannot post this video publicly on YouTube. If i were to post this video privately, it would be futile to embed this on the blog. I suppose screen shot of the beginning of the digital story will have to do for Weebly. Below you will see the script and storyboard for the video.
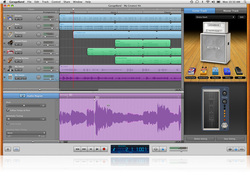 Garage Band has various features that I found exciting and useful. With some simple instruction, students will enjoy recording and manipulating their voices. I like the simplicity of creating new tracks, splitting audio clips, and adding effects. I am not sure how much i enjoy the feature of adding pictures and video. If one has Garage Band, they likely have iMovie. iMovie is much more efficient and useful when adding visual aspect to a project.
Of all the picture apps explored, I found PhotoFunia to be the most entertaining, easy to use, and full of effects. I was familiar with many of the apps covered in this session, but it was fun to see them from the student/teacher's perspective. The apps covered in this short class included: Instagram, Camera +, Frame Magic, Aviary, BeFunky, Adobe Photoshop Express, PhotoFunia, Space Paint, Color Effects, Pixlr Express.
We spent the rest of the instruction period, prior to lunch, working on writing scripts for our digital story. I feel that scripts can be very useful, and in the long run, save time. This is especially the case with larger scale movies and plays. When students begin writing and recording their movies and projects, having a script will make the story more cohesive, understandable, and they will stay focused while working.
Living in the Story and Unfolding Lessons Learned. If either of these two elements is missing, you likely are viewing a great digital story... but not storytelling.
Read more: http://creativeeducator.tech4learning.com/v04/articles/The_Art_of_Digital_Storytelling#ixzz2aYGNfHWh
Living the Story
It is all about the connection with the audience. It is vital to make the story personable and "sticky" so they will remember it. Knowing what will capture one's attention, keep their attention, and and enthrall them in your story is the trick to storytelling. The more they can relate to the story, the more they will enjoy listening and staying engaged.
Unfolding Lessons Learned
So what? That is a question you never want the audience to ask while your telling a story. If they don't follow the story because they can't relate or difficulty in following the storyline. When one looks for a moral of the story it is basically asking them, what does it mean, how will this relate to me, how can i implement the lesson learned into my life. It is good to let the listeners find deeper meaning on there own, but the basic theme or lesson of the story should be plain and clearly stated. In the recent film, Lincoln, (which I would not recommend starting at 10:30 pm) had several examples of great story telling. Daniel Day-Lewis portrayed President Lincoln, and shared stories throughout the entire film utilizing the talents of Living the Story and Unfolding Lessons Learned.
3 forms of Digital Storytelling in the classroom As for students using digital storytelling, there are various programs and projects that they can use.
1) Comic Life is a great way to storyboard their various projects when digital storyboarding is used. If they are creating a project for a book report, they can use this as a guide or an actual report. This is also a great way to do a digital concept map. Social studies is often given the backseat due to time and core tested subjects. This is a slick way to take social studies and incorporate digital/technological topics.
2) Writing screen plays and short stories and creating a movie through iMovie. This is more complicated, but once you utilize this program and become familiar with it's functions, it is an invaluable tool to create different movies. You can utilize this with Comic Life, time lapses, and stop motion animation. It ties everything together and creates a fluid/watchable product. It also gives you the opportunity to create storyboarding within the movie. Along with movies, the trailer format is great for small projects.
3) iMotion is a FREE (I repeat, FREE) app that is easy to use and produces great productions... pending on the imagination, ingenuity and work of the user. As a class, we used pipe cleaners to create a stop-motion animated flick. One of the best aspects to the iMotion, is the ability to use another device as a remote to take pictures. This is incredibly useful when working with in a group. This can be used with, social studies, language arts, and even math. I thought that giving the students the opportunity to create stop motion movies with math manipulatives could be incredibly fun and informational.
 Monitoring and stopping cyber-bullying appears to be a daunting and overwhelming task. With the digital/technological age in most aspects of our lives, becoming aware and educated of issues that we WILL come in contact with is mandatory. Sadly, it has taken several tragedies related to cyber bullying prior to the this becoming a public concern. The first thing that comes to mind is; how can I prevent cyber bullying and where do I start?
This first step is to become aware and educated on the subject of cyber bullying. The internet gives us a plethora of information pertaining to the subject. Another incredible fount of information comes from within the community. Talk to your neighbors and friends. Chances are, they have stories of cyber bulling that are much closer to home than we might think. This provides you with insight into your very community. A personal experience comes in the form a text message cyber bullying. A friend had recently gone through a rough breakup of a relationship. A friend of her ex, began sending scathing and violent texts. With my friend at an emotionally unstable state of mind, these texts effected her much more than anyone could have imagined. Luckily, a screen shot was taken of one of these texts and others where able to intervene prior to a tragedy... barely.
Educating others about privacy settings will protect their information from prying eyes. I liked the idea of "googling your name" and getting rid of anything you do not want public. Along with educating children, parents need to understand what is going on and the pros/cons of online social networking. Getting involved and creating a community that will help and support victims of all types of bullying and educating everyone to prevent bullying.
 I found several aspects of storyboarding incredibly insightful. I will definitely use some of these next year in my class. During the 2012-2013 school year, my entire class made several movies. I felt that storyboarding was one of the harder concepts to teach. The students acted as if it was useless and tedious. I would love to show the difference between two movies where one storyboards and one goes straight to shooting. A video that we watched, featuring Disney, is an incredible video to use in displaying the benefits of storyboarding.
The stop motion apps show promise. I have used the stop motion and time-lapses via GoPro. I like the iMotion app. I also enjoy the ability to use the remote from another device to capture images and control the primary device. Here are a few time lapses I created during the 2012-2013 school year.
|

 RSS Feed